loopback注册后发送邮箱验证
开始
安装loopback源码(要是不知道slc命令的可以先看我的Node.js框架lookback学习一 )
$ slc loopback
创建一个基于User的模型WenUsers(这个名字是随便取的)
$ slc loopback:model
1
2
3
4
5
6
7
8
9
? Enter the model name: WenUsers
? Enter the model name: WenUsers
? Select the data-source to attach WenUsers to: db (memory)
? Select model's base class User
? Expose WenUsers via the REST API? Yes
? Common model or server only? common
Let's add some WenUsers properties now.
Enter an empty property name when done.
? Property name:
此时源码会多出目录./common/models/,在这个目录下会多出两个文件wen-users.js和wen-users.json
编辑wen-users.js 文件
1
2
3
4
5
6
7
8
9
10
11
12
13
14
15
16
17
18
19
20
21
22
23
24
25
26
27
28
29
module.exports = function(WenUsers) {
  WenUsers.sayHi = function(callback) {//定义一个http接口方法
    callback(null, 'hi');
  };
  WenUsers.remoteMethod(//把方法暴露给http接口
    'sayHi',
    {
      'accepts': [],
      'returns':[
        {'arg': 'result','type': 'string'}
      ],
      'http':{
        'verb': 'get',
        'path': '/say-hi'
      }
    }
  );
  WenUsers.afterRemote('create',function(context, user, next) {//注册后的回调
    console.log("> user.afterRemote triggered");
    var option={//配置邮件发送参数
      type: 'email',
      to: user.email, //邮件接收方,即注册时填入的有限地址
      from: '408523614@qq.com',//邮件发送方
      subject: 'Thanks for registering.',//发送的邮件标题
      redirect: '/'//点击发送到邮件的链接激活账号后的回调http地址
    };
    user.verify(option, next);
  })
};
以上代码,我们暴露了一个http接口方法sayHi,用于测试,此时你运行项目slc run,打开链接http://localhost:3000/explorer 就会看到页面多出了一个WenUsers接口,在接口下边多出了一个WenUsers/say-hi方法接口(说明刚创建的模型WenUsers接口是没问题的)
编辑wen-users.json 文件
1
2
3
4
5
6
7
8
9
10
11
12
13
14
15
16
17
18
19
20
{
  "name": "WenUsers",
  "base": "User",
  "idInjection": true,
  "options": {
    "validateUpsert": true
  },
  "properties": {},
  "validations": [],
  "relations": {},
  "acls": [
    {
      "principalType": "ROLE",
      "principalId": "$everyone",
      "accessType": "READ",
      "permission": "ALLOW"
    }
  ],
  "methods": {}
}
acls这个配置是权限配置,让所有用户都可以访问自己定义的接口。
配置.server/model-config.json这个文件,即配置邮件数据源的指定,在文件的最后加入,代码如下:
1
2
3
4
5
6
7
8
9
10
"WenUsers": {
    "dataSource": "db",
    "public": true,
    "options": {
      "emailVerificationRequired": true
    }
  },
  "Email":{
    "dataSource": "email"
  }
配置./server/datasources.json这个文件,即配置邮件数据源,在文件的最后加入,代码如下:
1
2
3
4
5
6
7
8
9
10
11
12
13
14
15
16
17
18
19
 "email":{
    "name":"email",
    "connector": "mail",
    "transports": [
      {
        "type": "smtp",
        "host": "smtp.qq.com",
        "secure": true,
        "port": 465,
        "tls": {
          "rejectUnauthorized": false
        },
        "auth":{
          "user": "408523614@qq.com",
          "pass": "这里输入你的邮箱密码"
        }
      }
    ]
  }
这里我填入的是我的qq邮箱,这个邮箱是用于发送配置的,即用这个邮箱给你待会注册的用户填入的邮箱,发送信息。
改一下./server/config.json这个文件中的host,发送邮件的时候会用到,本地测试一般都是127.0.0.1或localhost,修改如下图所示:
1
2
3
{
    "host": "localhost"
}
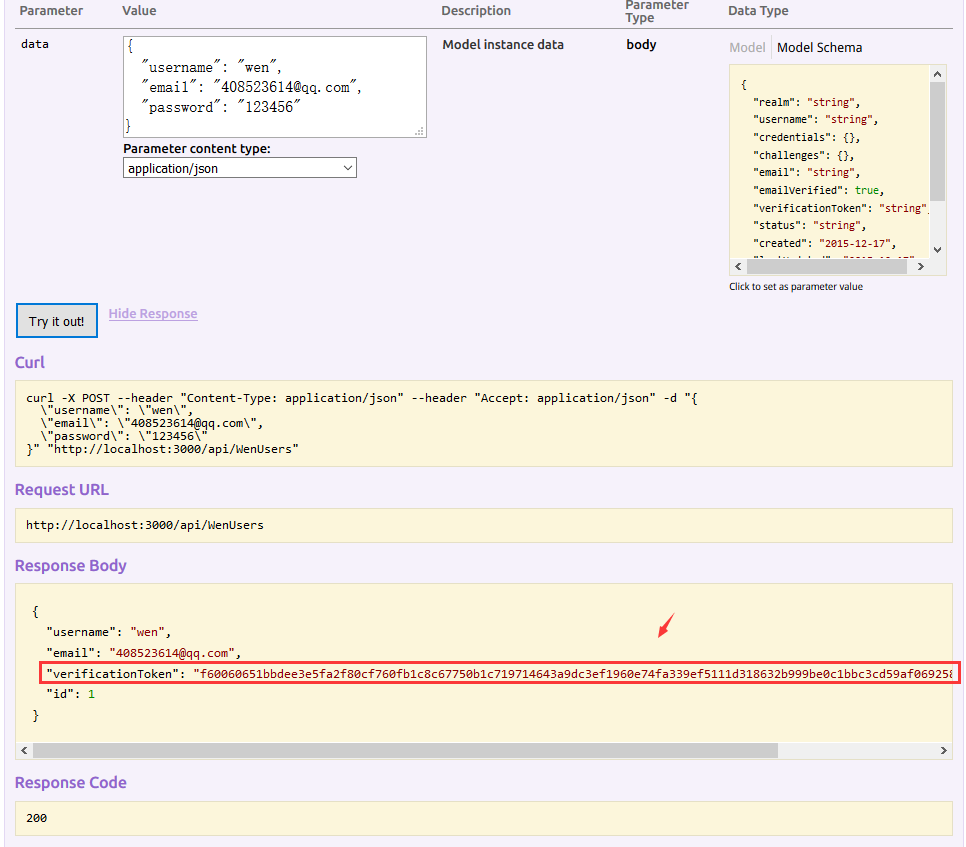
运行项目,测试注册一个用户,看是否会发送邮件,要是成功的话会看到如图所示:
以上代码会多出了 "verificationToken"这个字段,这个字段的生成是用来验证登陆的。
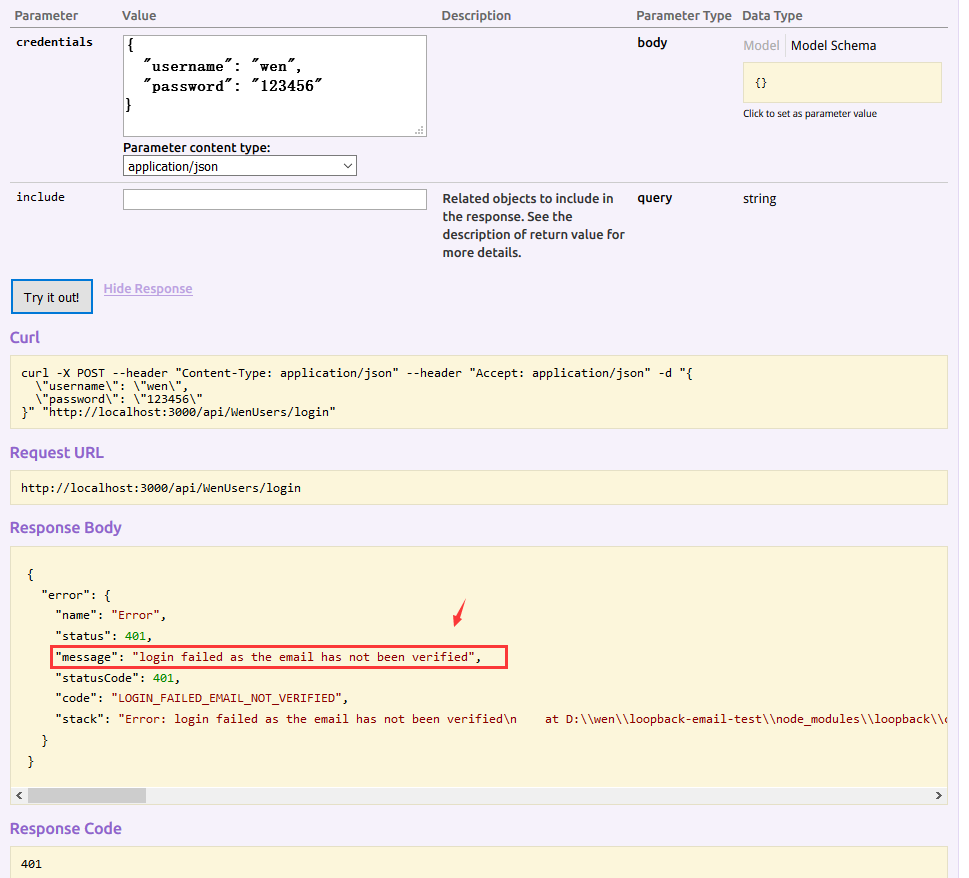
此时登陆,是不成功的,如图:
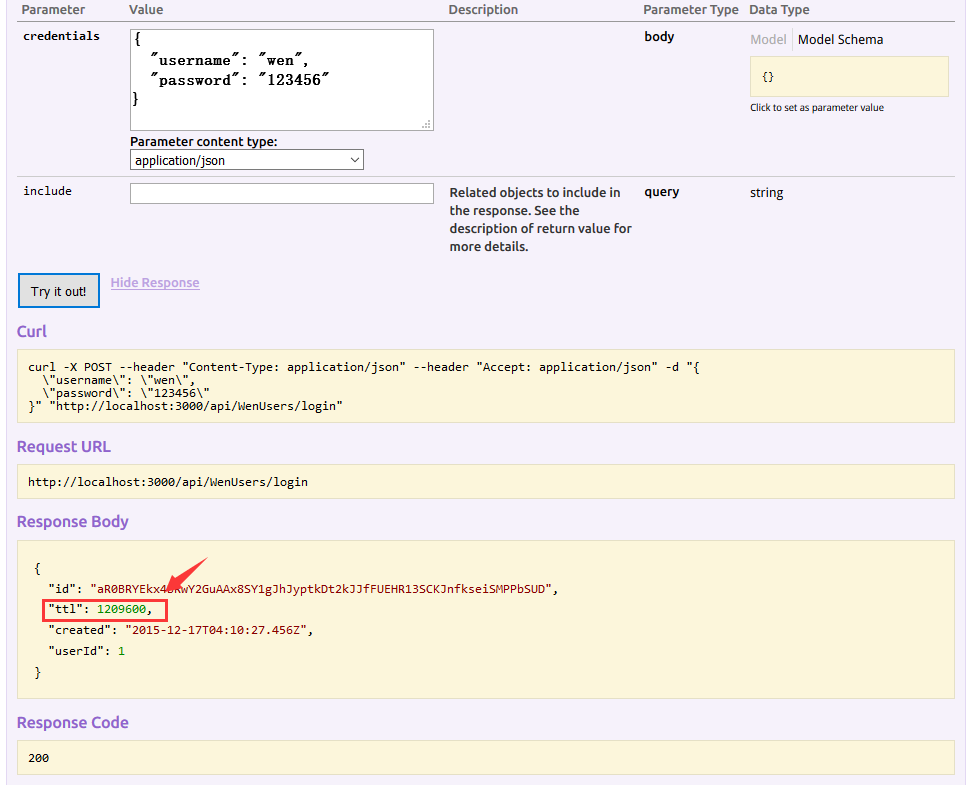
打开你邮件收到的链接,即激活了用户,然后再登陆测试,此时即可成功登陆,会返回一个ttl,如图所示:
以上源码可以在我的github上下载loopback-email-test


